Samples of CanvaKala, a plugin for WordPress
Looks can be deceiving when you fall for ‘shiny objects’ without proper research and trial.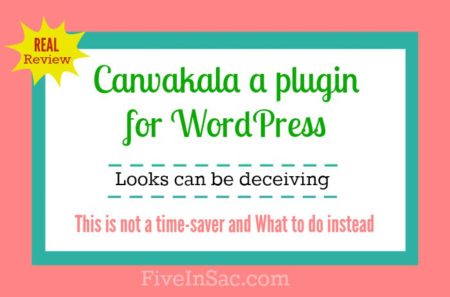
Before You Start
Before I get started I want to share a little back story with you. Originally this post was 639-words long. It is now 1945-words long. Why? I wrote a review for the plugin CanvaKala. After using it (or trying to use it) over the last month I decided to turn it into a review and a tutorial.
There is so much misinformation out there about the proper use of photos, where to find them, how to give credit, etc. Using this plugin falsely gives you the belief that the photos you are using are all free-to-use and alter. I found this NOT to be the case.
First you’ll find the blog post that led me to buy the plugin, then you’ll find my impressions (review) of the product as well as a link to another review of the product (which I happen to agree with).
After the review, I provide samples of images using the plugin for various blog types - food, crafts, finance, and education. But, after reading the later review I decided to do some checking on the photos I selected - to make sure the copyright was correct. This is where the review switched paths and turned into a tutorial on How to Find and Use Images Correctly.
1. Brett Ruttecky’s Review
To see the video review of this plugin visit Brett Ruttecky’s blog. This is the pitch that I fell for when I bought this ‘shiny object’. I truly believed it to be a worthwhile product to try and recommend to you. I’m not being disrespectful toward him, I just disagree with his review after using it. Also, I did not get all the upsells so I’m open to that being one of the reasons my experience was different.
2. My Thoughts on CanvaKala Plugin
At first I was excited to have this plugin as I thought it would make selecting photos and editing them easy. It is and it isn’t here’s why:
- It is a bit wonky. I’m not sure if this is because I bought the basic version without the upgrade or what. In the video review from Brett’s site, it works fine. (not all fonts work, the layers function doesn’t work, drawing seems to be bipolar)
- Image selection, although large, is very limited. In order to add Pixabay, (a great cc and cc0 image gallery) you need to upload 6 of your own pictures. Out of the 10 photos, I tried to upload only 2 were accepted. This alone limits this plugin for me. This requirement is what gets you the API code to use Pixabay inside the plugin.
- Photos you can use that are ‘attribution free‘ and modifiable seem to be old photos on Flickr which unless you blog about the past (think black and white old school photos) is not a fit.
3. C. Hughes Review
Here’s is what I believe to be an HONEST review of Canvakala with some points I missed.
Points that C. Hughes of OnlineLabGuy makes that I didn’t think of but are valid:
- The copyright validity of your images. How can you be sure that the plugin is correct and showing cc and/or cc0 images?
- Large images are not optimized for the web thus creating a ‘load’ on your website and slowing it down.
- You can do the same thing (better) in applications like PicMonkey and Canva and it is NOT ‘Photoshop for WordPress’. I have Photoshop Elements and it does not compare.
- Using the name Canva in the product name is ‘piggybacking’ on a well-known, high-quality brand which is BAD business
P.S. I am not an affiliate for CanvaKala, JVZoo, or Brett Ruttecky nor am I a Wealthy Affiliate (C. Huges) member. I DO, however, buy products, use them and if I like them and find them useful, I will become an affiliate and recommend the product to you.
Sometimes, as is the case with this product, I do NOT recommend the product. I hope this helps deter you from succumbing to the ‘shiny object’ syndrome I find myself sick with at times, without first doing research and waiting for real-life experience. 🙂
CanvaKala Samples and What to Do Instead
Inside you will learn:
- how the plugin adds photos to your post inside WordPress (my experience)
- how to add the photo from Flickr manually
- give proper credit to the copyright holder
- how to download the photo from Flickr
- how to share the photo on social media, in your email, on forums, or on your blog
- what cc creative commons attributions allows for the photos you select
Food Bloggers
In this example, I entered ‘food’ into the search bar and selected ‘any attribution’. This image was selected from CC images on Flickr. It automatically grabbed the attribution and added it to the bottom of the photo. I opted to resize the image (right in WordPress) to fit my blog post dimensions.
Problem 1:
The first photo I selected, the attribution that the plugin provided was wrong. It neglected to link to the profile of the copyright holder which in the case of this photo required attribution. It had an incomplete link but got the right name. I had to reverse what I did to get the photo to find the actual Flickr link (before I added the image to my site with the plugin) in order to get the link to Michael Stern’s profile.
This is NOT a time-saver!
Adding a Flickr Photo to your post without CanvaKala
To select an image using Flickr CC (creative commons), just Click Here, select how you will attribute the photo, and search for your term (food). Once you find the image you want to use copy the URL and paste it into your WordPress Post (https://www.flickr.com/photos/68711844@N07/15638560527/). It should automatically add it to your post.
BUT WAIT you’re not done yet. On the bottom right it should tell you what the copyright of the image allows. In this case, it is “some rights reserved” with an image of a human and an image of what looks like a ‘streaming’ symbol.
Click on the link next to that (some rights reserved) and it will take you to the CC terms of this particular photo. This is where you will find the information on how you may use it in your work. Clicking that link will take you to the Creative Commons site (https://creativecommons.org/licenses/by-sa/2.0/).
It says you are free to:
- SHARE - copy and redistribute the material in any medium or format
- ADAPT - remix, transform, and build upon the material for any purpose, even commercially
- the licensor cannot revoke these freedoms as long as you follow the license terms
Attribution — (that little man symbol) You must give appropriate credit, provide a link to the license, and indicate if changes were made. You may do so in any reasonable manner, but not in any way that suggests the licensor endorses you or your use.
ShareAlike — (that little streaming symbol) If you remix, transform, or build upon the material, you must distribute your contributions under the same license as the original.
Before you publish your post you will need to give CC credit to Michael Stern, the owner of the copyright as well as the link to his profile and/or picture. (https://www.flickr.com/people/68711844@N07/)
Alternative to the above
After you search for the photo you want and check that you can use it in your work, simply click one of the little arrows on the bottom right, just below the photo. One is for sharing and the other is for downloading.
Share - (curved right arrow) selecting this option will allow you to share it on social media, embed it to your site (with header, footer, and size options), email it, or get BBCode to post in forums.
Download - (arrow with line) choosing this option you will be given a number of size choices. Select the one you want and download. REMEMBER to grab the CC copyright information and the link if you plan on using it online or somewhere else.
Craft Bloggers
Some rights reserved cc share-adapt-non-commercial by KawaiiCloud on Flickr
For this example, I selected ‘image can be modified’ and searched ‘crafts’ with any attribution. I used the photo resizer inside WordPress as well as the ‘Add Text’ function to add ‘crafts are fun’ on top of the photo.
You can add the title of your post as well as the URL of your site to the image for use on Pinterest. To be safe, I would probably add the CC for the user and/or select a photo with ‘no attribution’ required. (which after reading the review by C. Hughes and manually checking the photos I added her link to the photo via PicMonkey)
Problem 2: This photo does have a cc license which means you can use it on your blog post BUT what you don’t know by using the plugin is that you can NOT use it commercially.
If you click on the image it will take you to KawaiiCloud’s page with her CC rules. Unlike the first image where you were able to use the image for commercial uses, this one has a symbol with a crossed out dollar sign. This means you Can NOT use it for commercial reasons.
Another thing you would miss by using the plugin is the attribution statement - “and indicate if changes were made.” Since I added the words on top of the image via the plugin I altered the image and would need to state that if I used the image. (which I am doing - I also used PicMonkey to resize and crop the image)
[Click to Tweet “Be sure to read the copyright for each photo you use and memorize what the cc symbols mean. “]
Finance Bloggers
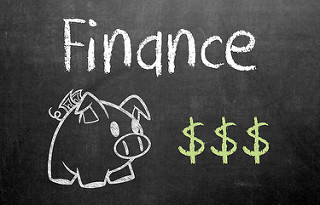
image: Finance cc Some Rights Reserved by JakeRust “gotcredit” on Flickr
When selecting this photo, I searched ‘finance’ and selected ‘any attribution’. I chose NOT to modify the photo. In this case, the proper credit was added by CanvaKala.
I did uninstall the plugin before publishing this post so what you see above is the link turned into a photo by WordPress, (see “Adding a Flickr Photo to your post without CanvaKala” above) not the one the plugin added. I added the copyright below it.
Education Bloggers
In this example, I chose to add a ‘border’ and use an ‘effect’ provided by the plugin.
The first photo is the original only resized (original is 1040 x 568):
The attribution was correct in this photo as well - using the plugin.

Somewhat of a Problem 3: Since I altered the photo with an effect and border I need to indicate that when attributing this photo. Something, that is very misleading when you read about this plugin but which is very important for you as a blogger. Always know the source of your files and read the original copyright. Don’t believe it until you see it.
The second photo includes the dashed border as well as the ‘bump’ effect. I tried adding a Star shape to it, but this function does not seem to be working.
Conclusion
Don’t give way to the ‘shiny object’ syndrome. It just wastes money, time, and adds virtual products to your virtual storage. Always buy from ‘tried and true’ sellers, this was the first time I purchased something from this venue. Be alert. When you have to go through many hoops to buy the product you want - many upsells - be warned, you might want to backup and cancel.
If you’ve read this far, congratulations, you now know what NOT to do when selecting a product to save you time. LOL 🙂
You also know how to:
- search Flickr creative commons for photos you can legally use on your blog and/or in your products
- add a photo from Flickr manually to your blog via a URL in WordPress
- give proper credit to the copyright holder by reading what the license actually says you can do with the photo
- download the photo from Flickr in multiple sizes
- share the photo on social media, in your email, on forums, or on your blog
- find what the cc creative commons attributions allows for the photos you select
Have you ever been sucked into a purchase only to find it wasn’t exactly as advertised? Comment below or join me on Facebook or Twitter for a chat.
P.S. Each week I share some pretty awesome stuff with my subscribers. Here’s an example: Clarity for Procrastinators instant video. Signup and be blessed.
Dee Ann Rice says
Sara,
I have heard of this plugin. Your appraisal of it is very interesting.
I thought the plugin was very interesting but I did not buy it or even look at it after hearing about how great it was. First off I do not like using any more plugins than I have to. I am always trying to get rid of plugins. Next I have photoshop and can do most anything in it without adding a plugin to my blog. Lastly I was worried about the pictures that were included or offered for use.
You have to be so careful when you use images on the internet. I purchase most of my images from what I consider reputable company.
I have a friend in the UK who, along with lots of other people, bought a package of images. Supposedly when you bought the package you could use all of the images in it. This was not ture at all. My friend used the images on the internet. Then the people who owned the images sued not only the people who put the package together but everyone who had purchased the package and used the images without giving proper credit.
My friend was lucky because they lived in the UK and there is a ceiling on how much you could be sued for. It was still alot of money though. The same was not true in the US. There is no ceiling and the people being sued in the US were looking at being sued for huge amounts of money just because they used images on the internet and innocently did not give credit.
I think I will keep doing images the way I am. I really do not like the idea of going though a third party.
Great post and very imformative.
Dee Ann Rice
S D says
Dee Ann,
Thank you for visiting. Your thoughts on Canvakala are appreciated. I learned a valuable lesson through this experience.
So sad to hear about your friend. That is often the case.
Sometimes, even photos uploaded to the cc0 sites (free to use with no attribution) doesn’t necessarily protect you. Sometimes, people will upload photos they do not have the rights to. This trickles down to you and a situation like what your friend went through happens.
I know bloggers need to be so careful about what they add to their site. Buying from reputable companies is also a key point. Yes, you can get something cheaper, but can you trust that what they are offering is valid?
One day I will purchase all images or just produce my own, until then, I am comfortable using cc0 sites like Pixabay.
Thank you again for visiting and voicing your opinion. Have a lovely day.